Are you tired of spending countless hours manually removing backgrounds from your images? Look no further than Paint.NET, a free and user-friendly image editing software, which offers a quick and easy solution to this tedious task. With its intuitive interface and powerful Magic Wand tool, you can effortlessly isolate your subject and create stunning compositions in minutes.

Image: www.pinterest.com
Step into the Dynamic World of Background Removal
Before we dive into the practicalities, let’s pause for a moment and appreciate the significance of background removal in the world of digital imagery. Whether you’re a seasoned graphic designer or a budding social media enthusiast, the ability to remove backgrounds grants you unparalleled creative freedom. From crafting eye-catching product shots to creating captivating social media content, the possibilities are boundless. So, let’s embrace this transformative technique and unlock the true potential of your images!
1. Unmasking the Magic Wand Tool
The Magic Wand tool is Paint.NET’s secret weapon for background removal. This magical tool allows you to select similar color regions within an image, making it a breeze to isolate your subject from the background clutter. To activate the Magic Wand, simply navigate to the “Tools” menu and click on “Magic Wand.”
2. Customizing the Magic Wand’s Sensitivity
The Magic Wand’s sensitivity plays a crucial role in determining the accuracy of your selection. A higher sensitivity will select a wider range of colors, potentially leading to unwanted areas being included in your selection. Conversely, a lower sensitivity will select a narrower range of colors, ensuring a more precise selection but potentially missing some areas of the background. Experiment with different sensitivity settings to find the optimal balance for your image.
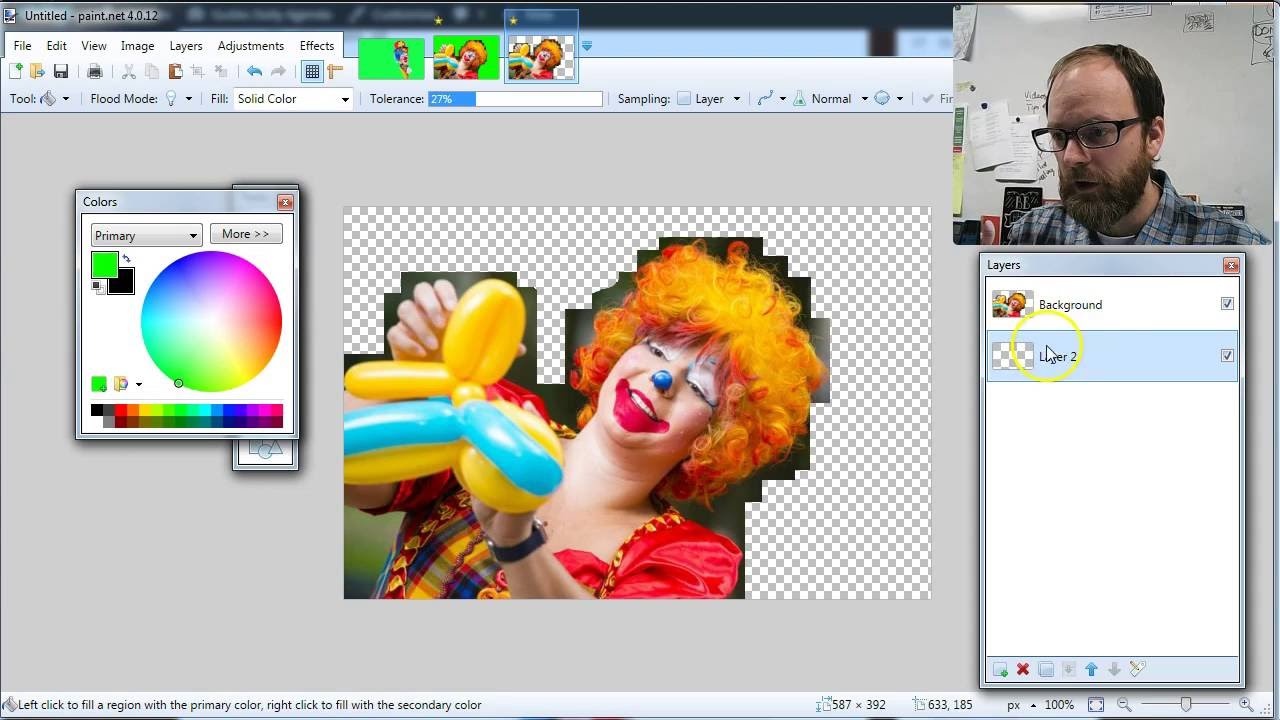
Image: www.themetapictures.com
3. Unleashing the Power of Tolerance
Tolerance is another critical parameter that governs the Magic Wand’s behavior. A higher tolerance allows the Magic Wand to select a wider range of colors that deviate from the initial color you clicked on, while a lower tolerance restricts the selection to colors that closely match the initial color. Adjust the tolerance setting based on the complexity of your image and the desired result.
4. Conquering the Multifaceted Anti-aliasing
Anti-aliasing is a technique used to smooth the edges of your selection, preventing jagged or pixelated borders around your subject. Paint.NET’s Magic Wand tool offers three anti-aliasing modes: “None,” “Normal,” and “Super.” “None” disables anti-aliasing, resulting in sharp edges. “Normal” applies a moderate level of anti-aliasing, while “Super” provides the smoothest edges but may introduce a slight blur to your subject. Choose the anti-aliasing mode that best suits your image and the desired effect.
5. Isolate Your Subject with Precision
With the Magic Wand’s settings configured, it’s time to isolate your subject. Click on the background area you want to remove. The Magic Wand will automatically select the pixels within the specified tolerance range. If the selection includes unwanted areas, hold down the “Shift” key and click on those areas to deselect them. To add areas to your selection, hold down the “Ctrl” key and click on them.
Paint Net How To Remove Background
6. Goodbye Background, Hello Transparency!
Once you’re satisfied with your selection, navigate to the “Edit” menu and click on “Clear Selection.” The selected background pixels will be replaced with transparent pixels, allowing you to place your subject on a new background or composite it with other images effortlessly. And there you have it – you’ve successfully removed the background from your image using Paint.NET’s Magic Wand tool!
